|
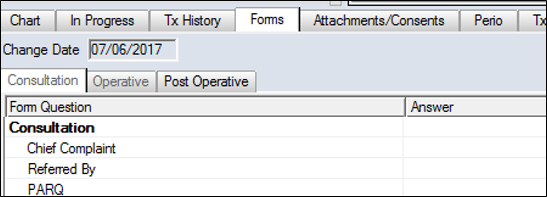
Once you have created a form, you can manage it from the EHR module > Forms tab.
 Complete Forms Complete Forms
After a form has been added to a patient record, it can be completed and saved.
Note: In-progress or completed forms attached to records such as treatments or labs display an indicator (
 ) icon in the related tab. ) icon in the related tab.
- Select a patient and open the correct form.
Example: Open the EHR module > Forms tab > From the Forms on File pane, select a form.
- Answer each question type as necessary.
Tips:
| Yes/No
|
Select the appropriate radio button.
Note: Depending on the form configuration, this question type may include a Don’t Know option or a certain response may trigger sub-questions (checklist or additional information).
|
| Text
|
Enter free text in the field.
|
| Number
|
Enter a numeric value in the field.
Note: Acceptable values, ranges and increments may be enforced.
|
| List
|
Select the answer from the drop-down list or select a radio button answer. |
| Date
|
Click the down arrow beside the field to enter a date. |
| Images
|
Use basic imaging editing features to draw the answer on the image. |
| Attachments
|
Add an attachment to the form. |
| Spreadsheets
|
Enter the required information in the correct fields. |
| Calculated answers
|
Calculate the answers in the background based on other information from the patient’s record. |
Depending on the form setup and the answer you supply, a question may trigger:
- A sub-question to appear.
- An Alert to be attached to the patient record.
- A Patient Need to be attached to the patient record.
Note: Alerts and Patient Needs indicate that a patient has a certain medical condition, allergy, specified need, etc.
-
If necessary, review sub-question windows and answer the sub-question(s).
-
When all page questions are answered, click the next tab to view the next page.
Once all form questions and tabs are complete:
-
If required, obtain signature(s).
-
If required, obtain approval.
Add Form Actions
Some forms are simple and can be completed by a single user. More complex forms may go through a series of phases (statuses) and require input by multiple people.
Example: A complex course of treatment on a patient's account could require a specialist consult, then financial approval. This information cannot be stored on the planned treatment itself. A form easily captures and tracks the treatment's progression.
In the case of more complex forms, you may need to use form actions.
Form actions include:
To add form actions:
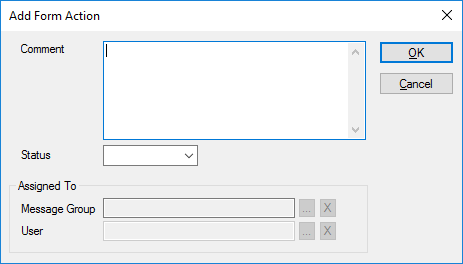
- Open or select a form and click the Add Action (
 ) icon to display the Add Form Action window. ) icon to display the Add Form Action window.
- Complete the fields as necessary and click OK.
| Comment
|
Enter a comment to describe the reason for this form action, or any additional relevant information.
|
| Status
|
If the form uses statuses, select the appropriate Status from the drop-down list.
Note: The Status entries are customized according to your institution.
Example: Reviewed by scheduler.
Tip: If configured, the selected status code automatically populates the Assigned To fields.
|
| Message Group / User
|
If the form can be assigned to either users or a messenger group, click the appropriate ellipsis to select the Message Group or User.
|
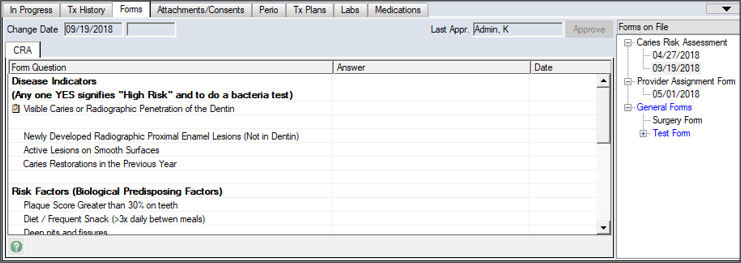
Review and Approve Forms
After a form has been completed by a provider or a patient, it must be approved. A single-instance form must be reviewed, updated, and approved each time a patient visits the institution. A multi-instance form must be filled out and approved when applicable to a procedure.
Answers that require approval display in blue or green text.
To review and approve a form:
- Select and open the form and review the question answers.
-
If the answer has not changed, select the question, right-click and select Answer Reviewed.
-
If the answer has changed, update as necessary.
Tip: To mark a whole page as reviewed, right-click a question and select Page Reviewed.
In the Date column, the time changes to the current time and the text changes to blue (if approval is required).
- Approve the form.
- Click Approve to display the Form Approval window.
- Select the Form or Current page only radio button and click Approve.
The form reloads and the colored text changes to black.
Suspend or Unsuspend Forms
Forms can be suspended to indicate that they are incomplete, but not active or in process. You can resume a suspended form by unsuspending it.
To suspend or unsuspend a form:
- Select a form and complete any of the following actions:
- If the form is active, click the Suspend Form (
 ) icon. ) icon.
- When prompted, enter your suspension reason and click OK.
- If the form is suspended, select a form and click the Unsuspend Form (
 ) icon. ) icon.
- When prompted, click Yes to confirm you want to unsuspend the form.
- If required, get approval.
If suspended, the form displays in the list with gray text.
If unsuspended, the form is now active and no longer displays with gray text.
Delete Forms
In extreme circumstances, it is possible to delete a form.
Important: We do not recommend deleting forms.
To delete a form:
- Select a form and click the Delete Record (
 ) icon. ) icon.
- When prompted, click Yes to confirm the deletion.
Print Forms
Forms can be printed using a standard or custom report.
- Standard Reports print the form as it displays in the EHR module >Forms tab.
- Custom Reports use a customized Crystal Report specific to the form.
To print a form:
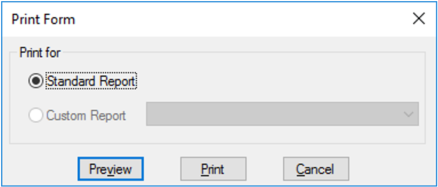
- Select a form and click the Print Report (
 ) icon to display the Print Form window. ) icon to display the Print Form window.
- Select the Standard Report or Custom Report radio button.
- If you select the Custom Report option, select an option from the drop-down list.
- (Optional) Click Preview to view the form.
- Click Print.
|
 ) icon to display the View Forms Instructions page.